
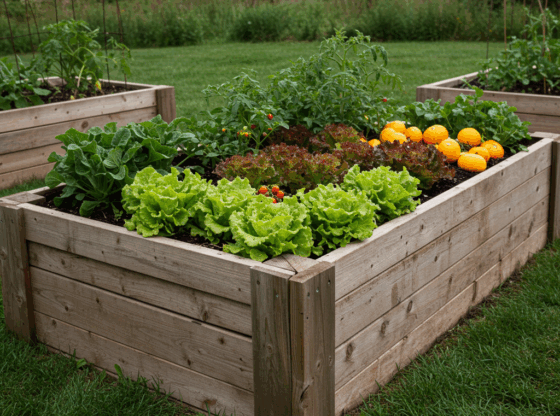
Dreaming of fresh, homegrown vegetables but facing challenges with poor soil, limited space, or pesky weeds? A raised garden bed might be your perfect solution! These elevated planting areas offer a multitude of benefits, making gardening more accessible, productive, and enjoyable. Building one isn’t as daunting as it might seem, and the rewards – a bountiful harvest just steps from your door – are well worth the effort.
Why Go Up? The Advantages of Raised Beds
Raised beds aren’t just aesthetically pleasing additions to your yard; they offer significant practical advantages for growing vegetables:
- Improved Drainage: Lifting the soil level above the surrounding ground prevents waterlogging, which is crucial for healthy root development and preventing root rot, especially in areas with heavy clay soil.
- Warmer Soil: Raised beds tend to warm up earlier in the spring, allowing you to plant sooner and potentially extend your growing season. The soil also drains better, preventing it from staying cold and wet.
- Easier Access and Reduced Strain: The elevated height means less bending and kneeling, making planting, weeding, and harvesting much more comfortable, especially for those with mobility issues.
- Weed Control: By starting with fresh, weed-free soil mix and clearly defining the bed’s edges, you drastically reduce weed pressure compared to in-ground gardens.
- Soil Control: You have complete control over your soil composition. You can fill your raised bed with the perfect blend of topsoil, compost, and amendments tailored specifically for growing vegetables, regardless of your native soil quality.
- Pest Deterrent: While not a complete barrier, the defined edges can make it slightly more difficult for some ground-level pests to access your plants.
- Defined Growing Area: Raised beds create neat, organized garden spaces that are easy to manage and look beautiful.
Planning Your Elevated Oasis
Before you start building, a little planning goes a long way:
- Location, Location, Location: Most vegetables need at least 6-8 hours of direct sunlight per day. Observe your yard throughout the day to find the sunniest spot. Consider proximity to a water source and easy access for tending and harvesting.
- Size and Shape: Common heights for raised beds are 6 to 12 inches, but they can be taller. For width, aim for no more than 3-4 feet if you’ll only be accessing from one side, or 6-8 feet if you can walk around it. This allows you to easily reach the center of the bed without stepping on the soil (which compacts it). Length is flexible, limited only by your space and materials. Rectangular beds are common, but L-shapes or other configurations can fit specific spaces.
- Depth Matters: While vegetables can grow in shallower beds, deeper beds (10-12+ inches) offer more root space, especially for root vegetables like carrots and potatoes. Deeper beds also retain moisture better.
Choosing Your Building Blocks
You have several options for materials, each with its pros and cons:
- Wood: A popular choice. Cedar and redwood are naturally rot-resistant and don’t require chemical treatment, lasting 10-15 years or more. Pine is less expensive but will rot faster unless treated. Avoid lumber treated with chromated copper arsenate (CCA), as arsenic can leach into the soil. Newer treatments like ACQ (Alkaline Copper Quaternary) are considered safer for garden beds, but untreated natural rot-resistant wood is often preferred for organic gardening.
- Stone or Brick: Durable and attractive, offering a more permanent solution. Can be more expensive and labor-intensive to build. Requires some basic masonry skills.
- Metal: Options include corrugated metal roofing or pre-fabricated metal kits. Can look modern and are durable, but metal can heat up in direct sun, potentially affecting soil temperature.
- Recycled Plastic or Composite Lumber: Made from recycled materials, these are durable, rot-proof, and low maintenance. Can be more expensive upfront than basic wood.
Building Your Raised Bed: A Step-by-Step Guide
Let’s assume you’re building a simple rectangular wooden bed:
- Gather Your Materials and Tools: You’ll need your chosen lumber (e.g., 2×8 or 2×12 boards), corner brackets or screws/nails, a saw (if cutting lumber), measuring tape, level, drill or hammer, and possibly stakes for reinforcement.
- Measure and Mark: Use your measuring tape to mark the dimensions of your bed on the ground.
- Prepare the Ground (Optional but Recommended): Clear the area of grass or weeds. You can lay down a layer of cardboard directly on the grass/weeds (remove tape and labels) to help suppress them – it will decompose over time. Level the ground as much as possible to ensure your bed sits evenly.
- Assemble the Frame: Cut your lumber to the desired lengths. If using corner brackets, attach them to the ends of your boards according to the product instructions. If using screws or nails, butt the ends of the boards together at the corners and secure them firmly. For added stability, you can cut smaller pieces of lumber (e.g., 2×4) to use as stakes driven into the ground at the corners or along the sides, and then screw the bed boards into the stakes.
- Place and Level: Position the assembled frame in your prepared spot. Use a level to ensure the top edges are level. Adjust as needed.
- Line the Bed (Optional): Some gardeners line the inside of their wooden beds with landscape fabric or a porous plastic liner (like pond liner with drainage holes added) to help prolong the life of the wood by preventing constant soil contact. However, this is debated, as it can also impede drainage if not done correctly. If using rot-resistant wood like cedar, lining isn’t strictly necessary for wood longevity.
Filling Your Bed: The Foundation for Success
Don’t just fill your raised bed with native soil, especially if it’s poor quality. The beauty of a raised bed is the ability to create an ideal growing medium:
- Layering (Optional): Some gardeners use a layering technique, placing organic matter at the bottom. You could start with a layer of cardboard (if you didn’t put it on the ground), followed by twigs, small branches, leaves, grass clippings, and then top it off with your soil mix. This mimics natural decomposition and improves drainage and fertility over time (sometimes called a modified “hugelkultur”).
- The Perfect Soil Mix: A common and effective mix is a blend of high-quality topsoil and compost. A ratio of 60% topsoil to 40% compost is a good starting point. You can also add a small amount of perlite or vermiculite for extra drainage and aeration. Bagged raised bed mixes are also available and can be a convenient option. Fill your bed to within a few inches of the top to leave space for mulching and watering.
Ready, Set, Plant!
With your raised bed built and filled, you’re ready for the exciting part – planting! Water the soil thoroughly after filling. Wait a few days for the soil to settle before planting your vegetables. Follow planting guidelines for spacing and depth specific to the vegetables you’ve chosen. Add a layer of mulch (like straw or shredded leaves) around your plants to help retain moisture, suppress weeds, and regulate soil temperature.1
Building a raised garden bed is a rewarding project that can significantly improve your vegetable gardening experience. With careful planning and a little effort, you’ll have a productive, easy-to-manage garden space that yields delicious, fresh produce for seasons to come. Happy gardening!