
The Raspberry Pi, that unassuming credit-card-sized computer, has revolutionized the world of DIY electronics and programming. Its low cost, versatility, and ease of use have made it a favorite among hobbyists, educators, and even professionals looking to prototype and deploy custom solutions. While the applications for a Raspberry Pi are virtually limitless, some of the most popular and practical projects revolve around enhancing our living spaces – transforming a standard house into a smarter, more efficient, and more entertaining home. As we move further into 2025, the capabilities of the latest Raspberry Pi models, coupled with readily available sensors, modules, and software, open up even more exciting possibilities for home-based projects.
Whether you’re a seasoned Pi veteran or just unboxing your first one, the satisfaction of building something tangible that improves your daily life is immense. These five projects are not only highly functional but also offer fantastic learning opportunities in areas like home automation, network management, media streaming, and basic programming. Let’s explore some compelling Raspberry Pi projects you can dive into right now to upgrade your home in 2025.
1. The Centralized Smart Home Hub
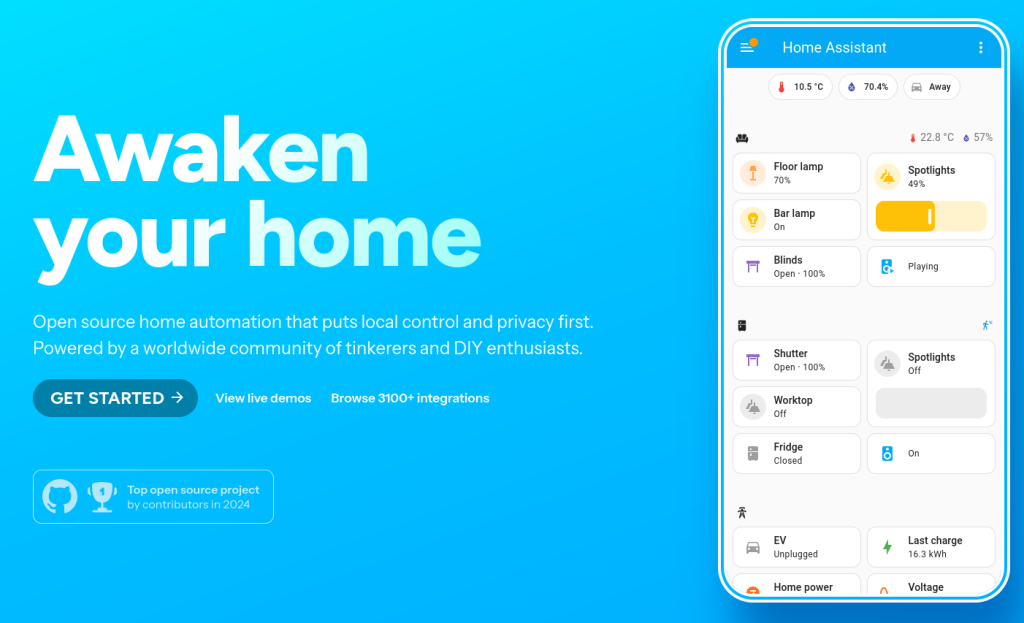
In an age where our homes are increasingly filled with smart devices – smart lights, thermostats, locks, and plugs – managing them all through disparate apps can quickly become cumbersome. A Raspberry Pi can serve as a powerful and customizable central hub for your smart home, bringing all your devices under one roof and allowing for sophisticated automation routines.
Imagine controlling all your lights with a single command, having your thermostat adjust automatically based on who is home, or receiving alerts if a door is left open. Projects like setting up a Home Assistant or OpenHAB server on a Raspberry Pi allow you to achieve this. These open-source platforms support a vast array of smart home protocols and devices, giving you far more flexibility and control than many commercial hubs.
Why it’s great for home: A centralized hub simplifies control, enables complex automation scenarios (like turning off all lights when you leave or turning on specific lights at sunset), and can often function locally within your network, offering better privacy and reliability compared to cloud-dependent services.
Components Needed:
- Raspberry Pi 4 or newer (for better performance with multiple devices)
- MicroSD card
- Power supply
- Ethernet cable (recommended for stability) or Wi-Fi
- Optional: Z-Wave or Zigbee USB dongle to communicate with a wider range of smart home devices.
Project Overview:
The process typically involves installing a chosen smart home platform (like Home Assistant OS) onto the MicroSD card, booting the Raspberry Pi, and then configuring the software through a web interface. You’ll then add your existing smart devices by integrating them with the platform. This often involves discovering devices on your network or using specific add-ons for different brands. Once devices are added, you can create dashboards for control and set up automation rules based on triggers like time, sensor readings, or device states.
2. Your Personal Home Media Server
Tired of juggling external hard drives filled with movies and TV shows, or paying for multiple streaming services that don’t have exactly what you want? A Raspberry Pi can be transformed into a capable home media server, allowing you to store your digital media collection in one place and stream it to any device in your house – be it a smart TV, computer, tablet, or smartphone.
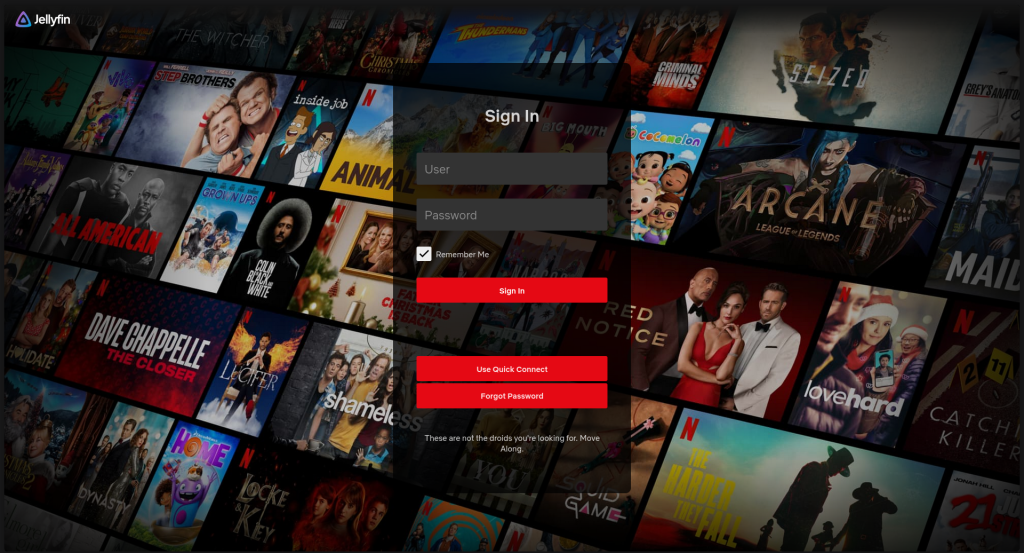
Software like Plex or Emby can be installed on the Raspberry Pi to organize your media, fetch metadata (like cover art, summaries, and cast information), and transcode video on the fly if needed to ensure smooth playback on different devices. This creates your own personal Netflix-like service, accessible only to you and those you choose to share it with on your home network.
Why it’s great for home: Provides a centralized, organized library of your digital media, eliminates the need for multiple copies of files, and allows streaming to various devices without relying on internet connectivity (once the media is stored locally).
Components Needed:
- Raspberry Pi 4 or newer (more RAM and processing power are beneficial for transcoding)
- MicroSD card
- Power supply
- External hard drive (for storing your media library)
- Ethernet cable (highly recommended for reliable streaming)
Project Overview:
Setting up a media server involves installing a media server software package (like Jellyfin) onto the Raspberry Pi. You’ll connect your external hard drive containing your media files. The media server software will then scan your library, organize it, and make it accessible through a web interface or dedicated client applications on your other devices. Configuration often involves pointing the software to your media folders and customizing libraries.
3. The Network-Wide Ad Blocker (Pi-hole)
Online advertisements and trackers are ubiquitous, slowing down browsing, consuming bandwidth, and raising privacy concerns. While browser extensions can block ads on individual devices, a Raspberry Pi running Pi-hole can block ads for every device on your entire home network – including smart TVs, gaming consoles, and mobile apps that don’t support browser extensions.
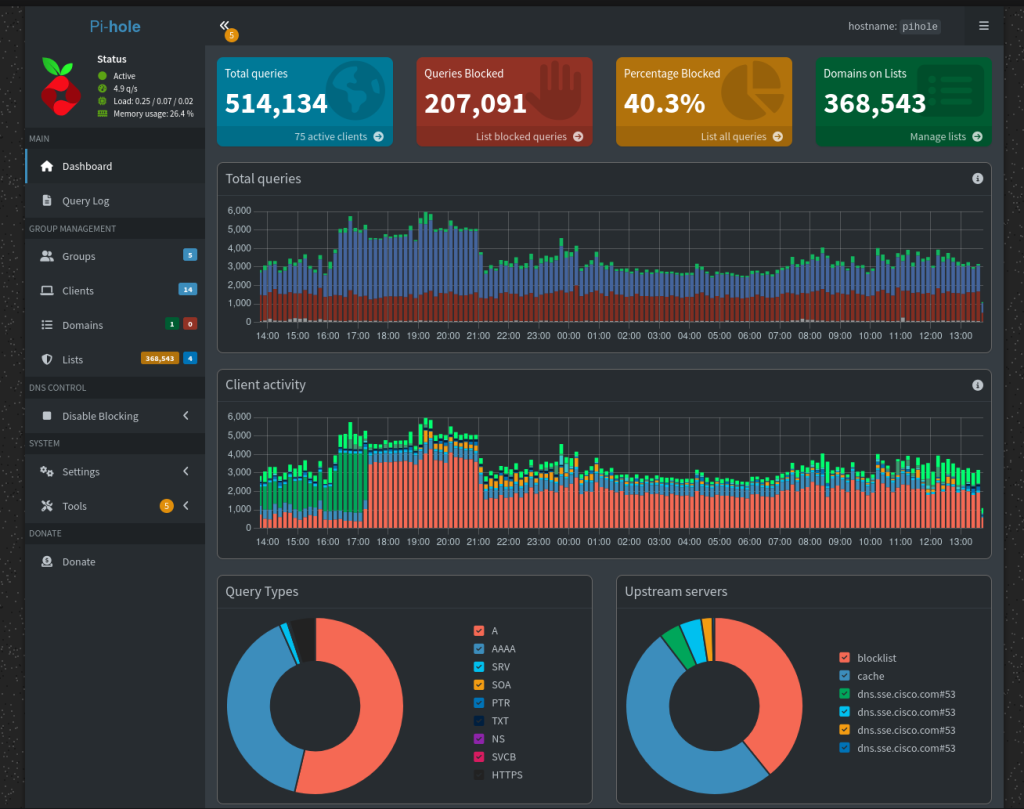
Pi-hole acts as a DNS sinkhole. When a device on your network requests the address of an ad server, Pi-hole intercepts the request and prevents the connection, effectively blocking the ad before it even reaches your device. This results in a cleaner, faster browsing experience and enhanced privacy across your network.
Why it’s great for home: Blocks ads and trackers for all connected devices, improves network performance by reducing unnecessary traffic, enhances privacy, and provides insights into network activity through its web interface.
Components Needed:
- Any Raspberry Pi model (even older ones are sufficient as Pi-hole is lightweight)
- MicroSD card
- Power supply
- Ethernet cable (recommended for reliable DNS service)
Project Overview:
This project is relatively straightforward. You install the Pi-hole software onto the Raspberry Pi (usually by running a single command in the terminal). Then, you configure your home router to use the Raspberry Pi’s IP address as the primary DNS server for all connected devices. Once configured, Pi-hole will automatically start blocking ad domains for all devices on the network. The web interface allows you to monitor blocked queries, view statistics, and customize blocklists. Add wireguard VPN to the setup and you can have the same coverage when you’re not at home too!
4. A Simple Home Security Camera System
Building a basic home surveillance system doesn’t require expensive, proprietary equipment. With a Raspberry Pi and a few cameras, you can set up a customizable security monitoring solution for your home. This can range from a single camera monitoring your front door to multiple cameras covering different areas.
Using software like MotionEyeOS or setting up motion detection with libraries like OpenCV on a standard Raspberry Pi OS installation, you can configure the system to detect movement and begin recording video or capturing images. These recordings can be stored locally on an attached USB drive or network storage, and you can often access the camera feed remotely.
Why it’s great for home: Provides a cost-effective way to monitor your property, offers customizable recording options (e.g., only record when motion is detected), and allows for remote viewing of camera feeds for peace of mind.
Components Needed:
- Raspberry Pi 3B+ or newer (for better camera performance)
- MicroSD card
- Power supply
- Raspberry Pi Camera Module or USB webcam(s)
- Optional: USB hard drive or network attached storage (NAS) for storing recordings.
Project Overview:
One approach is to install MotionEyeOS, an operating system specifically designed for surveillance projects, onto the MicroSD card. You connect your camera(s) to the Raspberry Pi. MotionEyeOS provides a web interface for configuring camera settings, motion detection zones, recording options, and remote access. Alternatively, you can install libraries like Motion or OpenCV on a standard Raspberry Pi OS and write scripts to handle motion detection and recording.
5. The Automated Indoor Garden Monitor
For those with a green thumb (or aspiring to have one), a Raspberry Pi can take the guesswork out of indoor gardening by monitoring crucial environmental factors. By connecting sensors for temperature, humidity, and soil moisture, you can get real-time data on the conditions your plants are experiencing.
Taking it a step further, you could automate tasks like watering by connecting a water pump and using the soil moisture sensor to trigger watering when the soil becomes too dry. You could also control grow lights based on a schedule or light sensor readings. This project helps ensure your plants thrive by providing them with optimal conditions consistently.
Why it’s great for home: Helps maintain ideal growing conditions for indoor plants, reduces the risk of over or under-watering, provides data to understand your plants’ needs, and can automate routine tasks.
Components Needed:
- Any Raspberry Pi model
- MicroSD card
- Power supply
- Environmental sensors (e.g., DHT22 for temperature/humidity, soil moisture sensor)
- Breadboard and jumper wires
- Optional: Relay module (to control pumps or lights), small water pump, light sensor.
Project Overview:
This project involves connecting the sensors to the Raspberry Pi’s GPIO pins. You’ll write or use existing Python scripts to read data from the sensors. This data can be displayed locally, logged to a file, or even sent to a cloud service for remote monitoring and historical analysis. If adding automation, you’ll use the sensor data to trigger actions, such as activating a relay to turn on a water pump when the soil moisture drops below a certain threshold.
Conclusion
The Raspberry Pi continues to be an incredibly powerful and accessible tool for anyone looking to experiment with technology and improve their home environment. The five projects outlined here – a smart home hub, a media server, an ad blocker, a security camera system, and an indoor garden monitor – represent just a fraction of what’s possible. Each project offers practical benefits for daily living and provides a fantastic opportunity to learn new skills in areas like programming, networking, and hardware interfacing.
Whether you’re aiming for ultimate convenience with home automation, building your personal entertainment library, reclaiming your internet speed from ads, enhancing your home’s security, or ensuring your houseplants flourish, there’s a Raspberry Pi project waiting for you. So grab a Raspberry Pi, pick a project that sparks your interest, and start building the smarter, more personalized home of 2025. The journey of turning an idea into a working solution is not only rewarding but also equips you with valuable skills for the future. Happy building!